
What is Mautic? — Marketing Automation Software
Mautic is an open-source, marketing automation system and is mostly used as a self-hosted email marketing solution.
What do we mean by a self-hosted email marketing solution?
There are two parts to be configured for an Email Marketing System. If you want more details, visit: Email Marketing Definitive Technical Guide
- The sender: (SMTP service) this is the technical part. It allows you to send emails over the internet.
- The Management Application, where you can configure and manage your Email Lists, Marketing Campaigns, monitor and analyze results, manage your sending servers, and so on.
So we connect both together to get an Email Marketing System.
")
In our case, The Management Application will be Mautic.
In this Guide, I will show you How to install Mautic and, all the configuration processes of Mautic setup step by step.
Mautic Installation
What is required to Setup Mautic?
What you need simply is:
- A VPS Server: Virtual Private Server to install Mautic on.
- Domain Name to use with our setup.
Get a Domain Name.
Getting a Domain is as simple as eating a piece of chocolate cake. You need to go to any Domain registrar company like Godaddy, Enom, Freenom, Namecheap…. and buy a Domain Name, you can even get one for 1$ per year.
I do recommend getting a .com domain that reflects your business. Anyway if you already have one, you can continue to get a VPS Server which is the next step.
Get a VPS Server.
Now, Let’s get our VPS server to set up Mautic.
What company should I use?
- Contabo
- DigitalOcean
- Amazon EC2
- HostGator
- Vultr, Linode, Bluehost, VPSServer, and more…….
So after choosing and signing up on any of the particular VPS company, just create a Server with the following specifications:
- Ubuntu 16/18 x64 as your operating system.
- You can start with 1 CPU/ 1 GB RAM (and you can resize later).
Point Domain to VPS.
Before we continue you need to point your domain or subdomain to your VPS IP address.
Let’s think, our main domain is xzyrx.com, then I will create a subdomain “mautic” as “mautic.xzyrx.com”, in the domain name registry and point it to the IP address provided by the VPS server.
Example,
“A record” for xzyrx.com <- Point to main domain IP
“A record” for “mautic” <- Point to above VPS IP
Done? Great! ✔️
OK so now we have a Domain and a VPS server, Let’s Start the installation.
Connect to your VPS server using any SSH client like putty.
and Let’s Install Apache, PHP, and MySQL which are the prerequisite for hosting any PHP application like mautic.
If you wish to setup Mautic or any Email Marketing System or get any service from us, Feel free to send your details using this form. Join our Newsletters to receive valuable posts and product announcements.
Step 1: Install Apache2 Web Server on Ubuntu
Run the commands below to Install Apache Web Server on your VPS Server. You can use any SSH client like Putty to run the commands.
sudo apt update
sudo apt install apache2
Just wait a few seconds for the installation to finish, then run the following commands to test and enable the Apache service.
sudo systemctl restart apache2.service
sudo systemctl enable apache2.service
To test the Apache is working on your Server, open any web browser and browse to the VPS IP address (http://Your_IP_Address).
You should see the Apache default page like this:
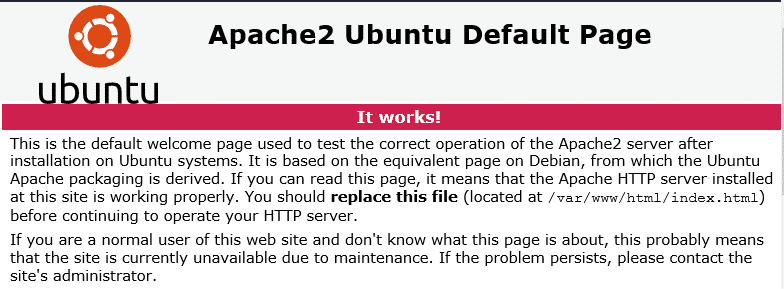
Installed Apache? Great! ✔️
Step 2: Install MariaDB (MySQL) Database Server
Mautic is like any other PHP System that requires a Database to save data. So we will use the MariaDB Mysql Database system for this purpose.
To install MariaDB run the commands below (Choose between Ubuntu 16, 18)
Run these on Ubuntu 16 LTS:
sudo apt-get install software-properties-common gnupg-curlsudo apt-key adv --fetch-keys 'https://mariadb.org/mariadb_release_signing_key.asc'sudo add-apt-repository 'deb [arch=amd64,arm64,i386,ppc64el] http://mirrors.piconets.webwerks.in/mariadb-mirror/repo/10.5/ubuntu xenial main'sudo apt updatesudo apt-get install mariadb-serverRun these on Ubuntu 18 LTS:
sudo apt-get install software-properties-commonsudo apt-key adv --fetch-keys 'https://mariadb.org/mariadb_release_signing_key.asc'sudo add-apt-repository 'deb [arch=amd64,arm64,ppc64el] http://mirrors.piconets.webwerks.in/mariadb-mirror/repo/10.5/ubuntu bionic main'sudo apt updatesudo apt-get install mariadb-serverThe commands below can be used to stop, start and enable the MariaDB MySQL service to always start up when the server boots.
Run these on Ubuntu 16 LTS
sudo systemctl stop mysql.service
sudo systemctl start mysql.service
sudo systemctl enable mysql.service
Run these on Ubuntu 18 LTS
sudo systemctl stop mariadb.service
sudo systemctl start mariadb.service
sudo systemctl enable mariadb.service
After that, run the commands below to secure the MariaDB server by creating a root password and disallowing remote root access.
sudo mysql_secure_installation
When prompted, answer the questions below:
- Enter current password for root (enter for none): Just press the Enter
- Socket password: N
- Set a root password? [Y/n]: Y
- New password: Enter your new password (create a secure one)
- Re-enter new password: Repeat your new password
- Remove anonymous users? [Y/n]: Y
- Disallow root login remotely? [Y/n]: Y
- Remove test database and access to it? [Y/n]: Y
- Reload privilege tables now? [Y/n]: Y
Restart MariaDB Mysql service
To test if MariaDB is installed, type the command below to logon to the MariaDB server
sudo mysql -u root -p
Then type the password you created above to login… if successful, you should see MariaDB welcome message like this:
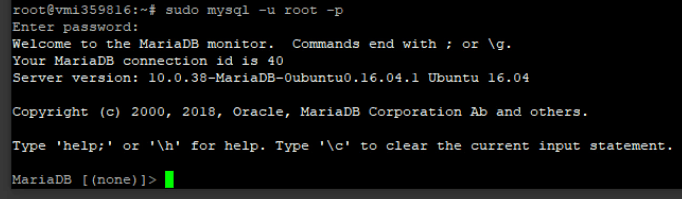
Type EXIT; and press Enter to exit from the MariaDB.
Installed DB? Great! ✔️
Step 3: Install PHP and Related Modules
Since Mautic is a PHP-based script, we need to install PHP and some modules on our server. I will be installing PHP 7.4 in this guide, but feel free to use any version you want, just change “7.4” to “7.X” in the commands.
Run the commands below to add the third party repository to install PHP 7.4
sudo apt-get install software-properties-common
sudo add-apt-repository ppa:ondrej/php
Then update:
sudo apt update
Next, run the commands below to install PHP 7.4 and related modules. (note: copy and paste as one command)
sudo apt install php7.4 libapache2-mod-php7.4 php7.4-common php7.4-gmp php7.4-curl php7.4-intl php7.4-mbstring php7.4-xmlrpc php7.4-mysql php7.4-bcmath php7.4-gd php7.4-xml php7.4-cli php7.4-zip php7.4-imap
Then run the following command:
sudo apt install php-pcovAfter installing PHP, we have to update php.ini file
How to open php.ini file to edit
Option 01 : Use WinSCP
WinSCP is a Free Remote Visual File manager that works over SSH, it makes things a lot easier from managing and editing files with putty.
Open WinSCP and connect to your server using your server IP/Name and root credentials. Then navigate this directory: “/etc/php/7.X/apache2/” where you can find the “php.ini” configuration file.
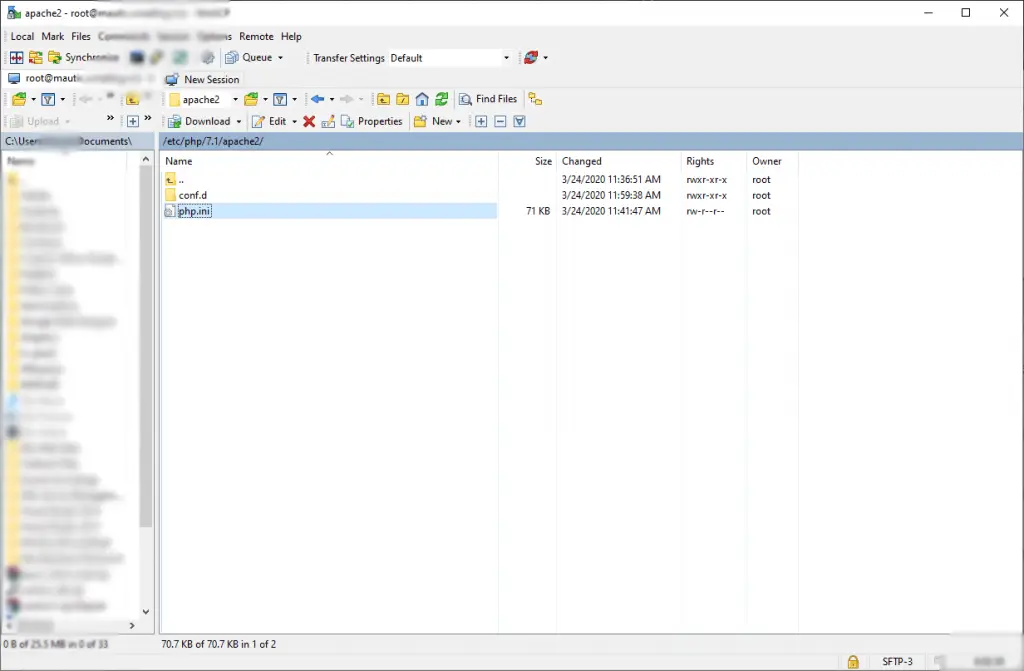
Right-click on “php.ini” and Click Edit.
Option 02: Use Vim or VI Editor commands.
Open the php.ini file located in “/etc/php/7.X/apache2/” using Vim or VI commands.
After opening the php.ini file to edit, make the changes on the following lines below in the file and save.
file_uploads = On
allow_url_fopen = On
short_open_tag = On
memory_limit = 256M //You can increase this if you server can handle
upload_max_filesize = 100M
max_execution_time = 360
date.timezone = America/NewYork //Set your Time Zone here
(If there is “;” at the beginning of the lines indicating above, remove that “;”)
After applying the changes above, save the file and Close. then Go to Putty again and restart the apache service:
sudo systemctl restart apache2.serviceInstalled PHP? Great! ✔️
Step 4: Create Mautic Database
Now, we are done installing all the prerequisites and our server is ready for installation, we need to create a Database for Mautic in MariaDB.
To login to the MariaDB MySql database server, run the commands below.
sudo mysql -u root -p
Then create a database called mautic (or any name you want)
CREATE DATABASE mautic;
Create a database user called mautic with a new password
CREATE USER 'mautic'@'localhost' IDENTIFIED BY 'Enter_Your_Password_Here';
Then grant the user full access to the database.
GRANT ALL ON mautic.* TO 'mautic'@'localhost' IDENTIFIED BY 'Enter_your_password_here' WITH GRANT OPTION;
Finally, save your changes and exit.
FLUSH PRIVILEGES;
EXIT;
Created a Mautic Database? Great! ✔️
Step 5: Download and Install Mautic.
To get Mautic latest release you may want to use the Github repository… Install Composer, Curl, and other dependencies by running the following commands:
#First Command:
sudo apt install curl git

#Second Command:
curl -sS https://getcomposer.org/installer | sudo php -- --install-dir=/usr/local/bin --filename=composer --version=1.10.13
When the operation finishes, change the directory to “/var/www/html” by running the following command:
cd /var/www/htmlThen Download the Mautic package:
sudo git clone https://github.com/mautic/mautic.gitNow Install Mautic by running the following commands:
cd /home/ruwan/web/a1saas.com/public_html/mautic

sudo composer install
After the installation finishes, we need to set some file permissions by running the following commands:
sudo chown -R www-data:www-data /home/ruwan/web/a1saas.com/public_html/mautic/

sudo chmod -R 755 /home/ruwan/web/a1saas.com/public_html/mautic/
Installed Mautic? Great! ✔️
Step 6: Configure Apache2 Web Server
Well Done, Now Mautic is installed, we just need to configure apache so we can access Mautic using our domain name. To do so, navigate to this directory: /etc/apache2/sites-available/ using WinSCP or putty then create a new empty file and name it “mautic.xzyrx.com.conf” (Change to your domain). You can use Vim/VI commands via putty or WinSCP for that.
Copy and paste the content below into that “mautic.xzyrx.com.conf” file and save.
<VirtualHost *:80>
     ServerAdmin admin@xzyrx.com
     DocumentRoot /home/ruwan/web/a1saas.com/public_html/mautic
     ServerName mautic.xzyrx.com
     ServerAlias mautic.xzyrx.com

     <Directory /home/ruwan/web/a1saas.com/public_html/mautic/>
        Options +FollowSymlinks
        AllowOverride All
        Require all granted
     </Directory>

     ErrorLog ${APACHE_LOG_DIR}/error.log
     CustomLog ${APACHE_LOG_DIR}/access.log combined

</VirtualHost>
Replace with your own domain, in my case its “mautic.xzyrx.com”
Enable mautic configuration in apache and restart the service.
Now simply, run the following commands to finish the setup:
sudo a2ensite mautic.xzyrx.com.conf

sudo a2enmod rewrite

sudo systemctl restart apache2.service
GREAT! You are almost done😀
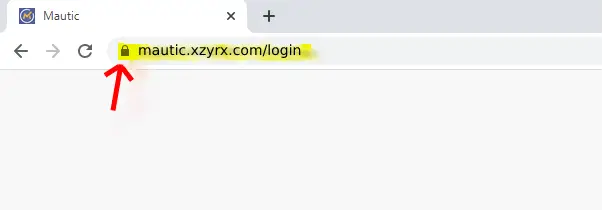
Open your web browser now and navigate to your server name like this:
http://mautic.xzyrx.com
You must see the setup completion wizard below:
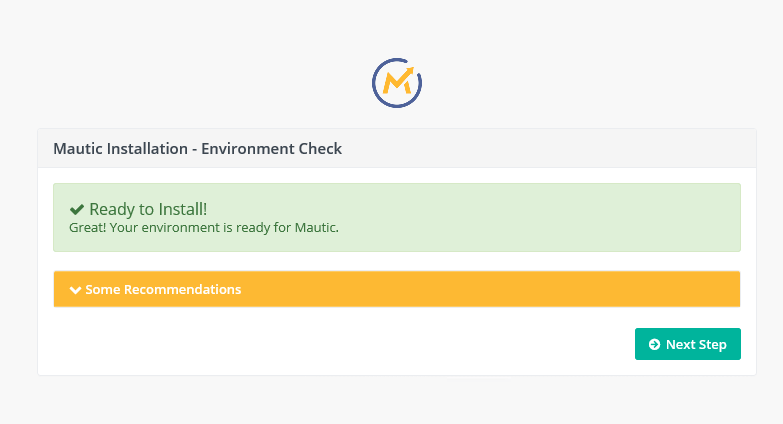
Continue the setup by entering the database info and your admin login information.
Done? Great! ✔️
Step 7: Configure Cron Jobs
Congratulations! Now we finished the Installation process and Mautic is up and running. we only need to set up the Cron jobs.
What are Cron Jobs?
Simply Cron Jobs are scheduled tasks that run automatically upon a schedule.
For example, if you created an email campaign that runs automatically every week. you need a task to run in the background automatically to trigger this campaign, this is the role of Cron jobs, so let’s set it up.
Mautic has several Cron Jobs, some are required and some are optional, check a list of all Mautic Cron jobs here.
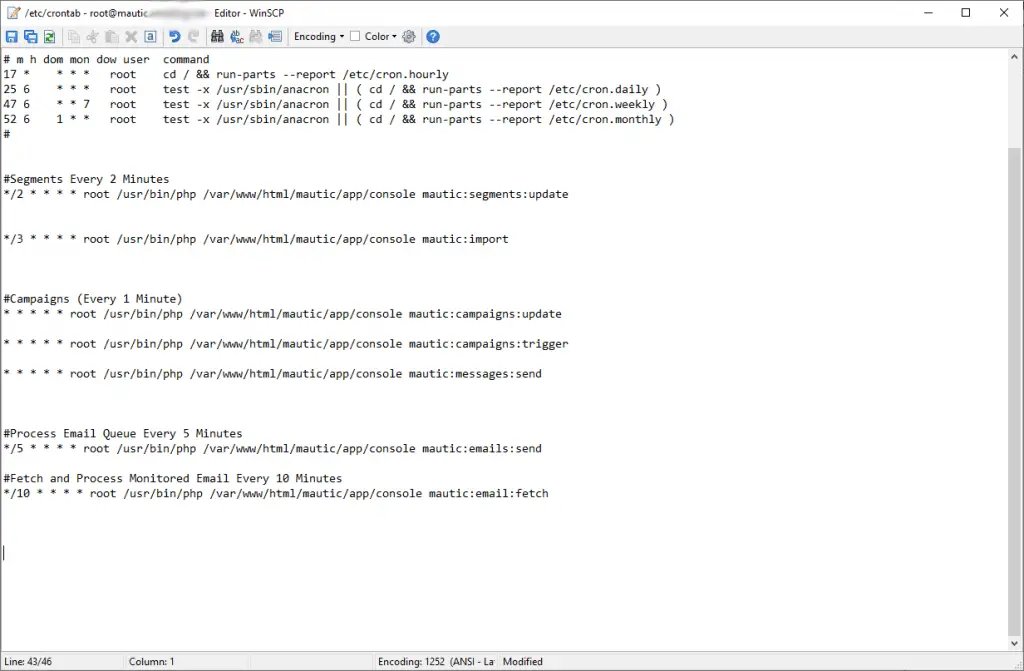
To make things easy for you, you will just need to copy the jobs below and paste them on your server.
#Segments Every 2 Minutes
*/2 * * * * root /usr/bin/php /home/ruwan/web/a1saas.com/public_html/mautic/bin/console mautic:segments:update

*/3 * * * * root /usr/bin/php /home/ruwan/web/a1saas.com/public_html/mautic/bin/console mautic:import


#Campaigns (Every 1 Minute)
* * * * * root /usr/bin/php /home/ruwan/web/a1saas.com/public_html/mautic/bin/console mautic:campaigns:update

* * * * * root /usr/bin/php /home/ruwan/web/a1saas.com/public_html/mautic/bin/console
 mautic:campaigns:trigger

* * * * * root /usr/bin/php /home/ruwan/web/a1saas.com/public_html/mautic/bin/console mautic:messages:send


#Process Email Queue Every 5 Minutes
*/5 * * * * root /usr/bin/php /home/ruwan/web/a1saas.com/public_html/mautic/bin/console mautic:emails:send


#Fetch and Process Monitored Email Every 10 Minutes
*/10 * * * * root /usr/bin/php /home/ruwan/web/a1saas.com/public_html/mautic/bin/console mautic:email:fetch
Where to paste them?
Go to the “/etc” directory, you will find the “crontab” file. Edit it, and paste the jobs inside, using WinSCP or Vim/VI commands, and then save.
Important Note:
Make sure to set each cronjob on one line after you copy it.
Make sure to add a new empty line after the last cronjob.
(Look at the image below)
Check If Cronjobs Are Correctly Configured.
After you paste and save the cronjobs (each on one line and add a new empty line after the last one), It’s a good practice to test if the file syntax is correct.
You can do this by simply running the following command in Putty.
crontab /etc/crontabIf the output were empty (nothing) then everything is ok!
That’s it! Enjoy Mautic.
Optional: Secure with a Free SSL.
SSL certificates are used within web servers to encrypt the traffic between the server and client, providing extra security for users accessing your application. Let’s Encrypt provides an easy way to obtain and install trusted certificates for free.
Connect to your Server using the Putty SSH client. and Let’s Start!
Step 1 — Install the Let’s Encrypt Client
Let’s Encrypt certificates are fetched via client software running on your server. The official client is called Certbot.
First, add the repository to install Certbot:
sudo add-apt-repository ppa:certbot/certbotYou’ll need to press ENTER to accept.
Then, Update the package list to pick up the new repository’s package information:
sudo apt-get updateInstall Certbot’s Apache package:
sudo apt install python-certbot-apacheIf you get an error, try the following:
sudo apt install python3-certbot-apacheCertbot is now ready to be used.
Step 2 — Set Up the SSL Certificate
Generating the SSL certificate for Apache using Certbot is quite straightforward. The client will automatically obtain and install a new SSL certificate that is valid for the domains provided as parameters.
Simply run the following command: (change the domain)
sudo certbot --apache -d mautic.xzyrx.comYou will be asked to provide an email address for lost key recovery and notices, and you will be able to choose between enabling both http and https access or forcing all requests to redirect to https. It is usually safest to require https, unless you have a specific need for unencrypted http traffic.
That’s it! ✔️
Test our website now, for me, I will open “https://mautic.xzyrx.com”
Good Luck!
Pingback: How to configure Amazon SES and Amazon WorkMail? - A1SaaS
Excellent post. I will be going through all these.
Thank you, for the comment.
If you want to know anything or if you are facing any issues, I would love to help you to make it a success.
You can email me for any issues – ruwan@a1saas.com